Part 1 · Getting started
A tour of the window
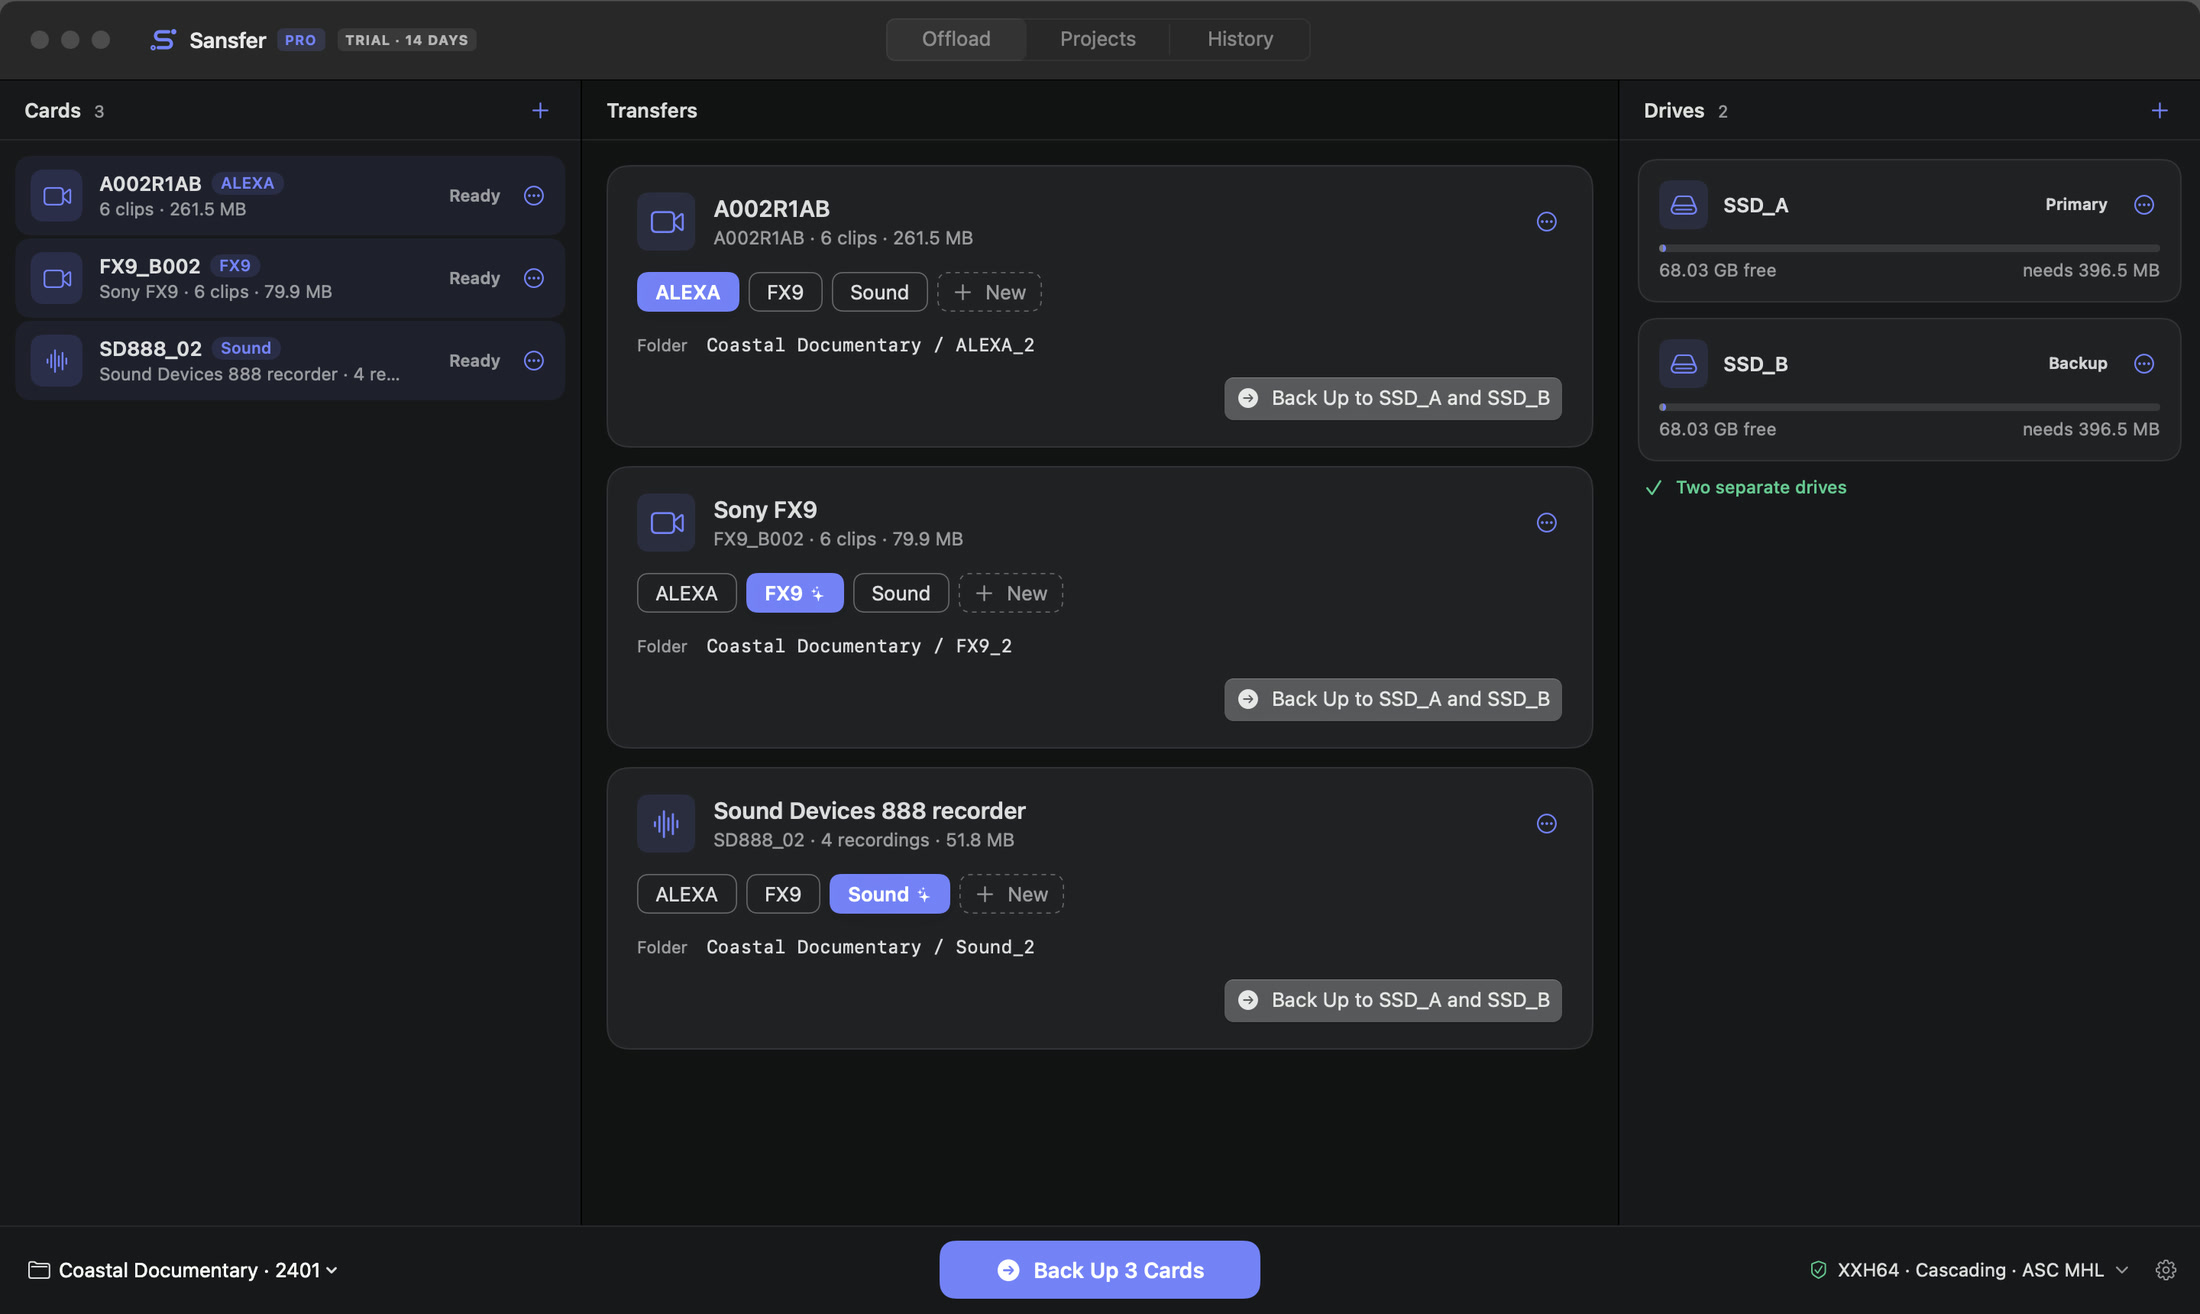
Sansfer has one main window with three sections. Offload, where you back up cards, is where you spend most of your time.
 1
2
3
4
5
6
7
8
9
10
- 1Sansfer and your edition. PRO for Sansfer Pro, and during the trial the days that are left.
- 2Sections. Offload, Projects and History (⌘1, ⌘2, ⌘3).
- 3Cards. Every card and folder Sansfer can back up, with what is on it and where it stands.
- 4Transfers. Each selected card with its label, folder and button; below them the running transfers and the cards that are done.
- 5Drives. The destinations, each with its role, free space and the space this transfer needs.
- 6Two separate drives. Shown when your copies are on different physical drives.
- 7Project. The production the cards belong to, or Quick copy.
- 8Back Up. Backs up every card that is ready (⌘ ↩).
- 9Transfer options. Checksum, ASC MHL, copy order, existing files and presets.
- 10Settings. Everything else (⌘ ,).
The top bar
On the left is the Sansfer name with your edition: PRO for Sansfer Pro. During the trial a badge shows how many days are left. In the middle are the three sections:
- Offload
- Back up cards: choose cards and drives, start, follow and finish transfers.
- Projects PRO
- Your productions, each with its details, cameras, card labels, folder structure, file names and every transfer made for it.
- History PRO
- Every transfer ever made on this Mac, with its checksums, results and reports.
Offload
Offload has three columns and a bar along the bottom.
Cards
The left column lists every card and folder Sansfer can back up. An inserted camera card appears by itself. Each card shows its name, its label (what the card is, such as ALEXA, FX9 or Sound), what is on it, and its state: Ready, Waiting, a percentage while it is copied, or Done. Click a card to include it in the next backup or leave it out. Chapter 5, Cards, explains everything you can do here.
Transfers
The middle column is where the work happens. At the top is a panel for every selected card: what it is, which label it gets, the folder it will land in and a button to back up just that card. Below are the transfers that are running or waiting, and at the bottom the cards that are Done.
Drives
The right column lists the destinations: a folder on each drive you copy to. Each shows its role (Primary, Backup, Archive or your own name), how much space is free and, before you start, how much the transfer needs. See Drives.
The bottom bar
On the left you choose the project, in the middle is the big Back Up button, and on the right the transfer options and the Settings gear. The button says what it will do: Back Up 3 Cards when three cards are ready. When nothing is ready it is dimmed; point at it to see why.
Projects and History
The other two sections are described in Projects and History. In Sansfer (without Pro) they explain what they offer and how to upgrade.
Settings
Open Settings with the gear in the bottom bar, with Sansfer › Settings… or with ⌘ ,. Settings has seven tabs: General, Transfers, Verification, Organization, Reports, License and Advanced. Every option is described in Settings.